Monday, April 30, 2012

Because you're mine, I walk the line...

A chopped salad with a southwest twist is on the menu. This salad is a combination of chicken, beans, corn, Mexican and ranch flavors. This is simplistic in preparation (if you wanted to make it even easier you could use a rotisserie chicken). The salad is packed with multiple bright and fresh flavors provided by tomatoes, scallions, avocados, herbs, and fresh lime juice. If you desired a sweet note you could add chopped mango or papaya. This is an excellent lunch or light dinner. I made basic cheese quesadillas with pico de gallo to serve alongside.  I encourage you to switch up your normal salad routine, and give this vibrant chopped salad a try. 


Ingredients:


2 C cooked chicken diced
1 green pepper, diced
1 jalapeno, diced
1 C black beans
1 C sweet yellow corn
2 roma tomatoes, diced
4 scallions, sliced
1 large romaine heart, chopped
1/2 bunch cilantro, chopped
2 just under ripe avocados, diced
2 C crushed tortilla chips


for the dressing:


1/2 C mayonnaise
1/2 C sour cream
1/2 T fresh chopped dill
1/2 T fresh chopped chives
1/2 T fresh chopped parsley
1 t cumin
1 t coriander
1 t cayenne pepper
1/2 tablespoon lime juice
salt & pepper, to taste


In a large bowl, stir all salad ingredients together, excluding the tortilla chips and avocado. In a small bowl, stir all dressing ingredients together until smooth. When ready to serve, toss salad with dressing then gently stir in avocado and tortilla chips.

If you are not planning on eating the entire salad just dress what you plan on eating, and save the dressing. If you are only using half and avocado, drizzle with lemon juice and cover tightly with saran wrap (it will keep for a day this way).

For a variation this salad could easily be placed into a wrap (an idea for a summer picnic).

Until tomorrow...Peace.
Pin It Now!

Sunday, April 29, 2012

All you touch and all you see, is all your life will ever be...

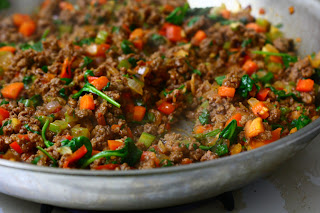
The post I bring to you today I believe is my favorite in quite awhile. Empanadas, a stuffed bread or pastry baked or fried in many countries in Western Europe, Latin America, and parts of Southeast Asia. The name comes from the verb empanar, meaning to wrap or coat in bread. Empanada is made by folding a dough or bread patty around the stuffing. The stuffing usually consists of a variety of meat, cheese, vegetables or fruits, among others. Empanadas trace their origins to Galicia and Portugal (this fact surprised me as I thought they originated in Latin America). They first appeared in medieval Iberia during the time of the Moorish invasions. A cookbook published in Catalan in 1520, the Libre del Coch by Ruperto de Nola, mentions empanadas filled with seafood among its recipes of Catalan, Italian, French, and Arabian food. In turn, it is believed that empanadas and the similar calzones are both derived from the Arabic meat-filled pies, samosas. After reading many empanada recipes, I chose beef, lot of veggies, and a mix of spices to fill mine. I used mango chutney and dates to add a hint of sweetness. I wanted to make sure my empanadas were not overly dense (it is important to roll the dough very thin). Do not be discouraged by the length of ingredients and instructions (honestly stuffing them took the most time). These are certainly worth the effort as they were truly delectable. This recipe makes many empanadas, after they are baked they may easily be frozen and reheated.


1 lb ground beef
1 T olive oil
1/4 C red bell pepper diced (about 1/4 pepper)
1/2 C carrots diced (about 1 carrot)
1/2 C celery diced (about 1 stalk)
1 medium onion, diced
1 jalapeno, chopped
6 dates chopped
1 tomato chopped
2 T Worcestershire sauce
2 T mango chutney
1/4 t paprika
1/4 t freshly grated nutmeg
1/2 t ground cinnamon
1/2 t garlic powder
1-2 t cumin
2 t sea salt
2 C loosely packed spinach leaves
1 C loosely packed cilantro

2 1/4 C of flour
1 1/2 t of salt
1 stick cold unsalted butter, diced
1 large egg
1/3 C of ice water
1 T distilled white vinegar


For the dough:

Sift flour along with the salt into a large bowl. Use a pastry cutter (or fork) to work in the butter until the mixture is the texture of coarse meal and has only a few remaining small lumps of butter. You can also do this with your fingers by rubbing the butter into the flour.

In a separate small bowl, beat the egg, water and vinegar together with a fork. Stir it into the dry mixture until it’s just incorporated.

Flour your hands and shape the dough into a ball. Place it on a lightly floured surface and use a light hand to knead it gently a few times before forming it into a flattened ball. Wrap the dough in plastic wrap and refrigerate for an hour.


For the filling:

Start by heating half the oil in a large pan over medium high heat, add the carrots, celery, bell pepper, jalapeno, onion and garlic, saute for 5-7 minutes. While sauteing, add 1/4 t of cinnamon, 1/2 t cumin and 1/4 t sea salt. Remove veggies from pan to a medium bowl.

In the same pan heat the rest of the oil over medium high heat. Add the ground beef and cook until browned. While cooking add the nutmeg, cumin, cinnamon, paprika, garlic powder, worcestershire sauce and mango chutney. Use a wooden spoon to break up the beef into small pieces.

Once the beef is mostly cooked add the tomato and spinach and add back in the veggies, simmer for a few more minutes until the beef is thoroughly cooked. Add the cilantro and turn off of heat.

To assemble, have the empanada dough ready, rolled out (using 1/4-1/2 c. more flour as needed) cut into circles with a 4-5 inch diameter. Add about 2 Tbsp of the filling into each circle. Fold over, leaving a little extra dough on the bottom layer to pinch up and fold over the top layer. Repeat until all sides are sealed with a pinch. Or you could just use a fork to pinch the edges together. Place the empanadas in a parchment lined baking sheet. Refrigerate for about 10 minutes before baking to let everything set together and get the crust nice and cold.

Brush the top of each empanada with an egg wash of egg and water to get that nice golden brown color.

Bake for 20-25 minutes in a 375 degree oven or until golden brown.

Serve with additional mango chutney, hot sauce, and sour cream.

Until tomorrow...Peace.

Pin It Now!

Friday, April 27, 2012

You don't have to live like a refugee...

Today I have combined three ingredients I adore: bread, cheese, and artichokes. I have not had a recent bread post, while this is not a new bread recipe (I utilized the baguette recipe) it is a new use. This recipe is simple and delicious. I was inspired while I was grocery shopping, and caught a glimpse of a similar medley in the bakery case. I decided to give a hand at my own version. I chose to keep it simple with just artichokes. I also envision deliciousness with roasted peppers, olives, sauteed mushrooms and  caramelized onions. You could easily create any combination you desired. I ate this for a light dinner with a large salad and grilled chicken, delightful. I foresee this being an excellent appetizer, or addition to a game day spread (seeing it's similarity to cheesy bread sticks). I warmed a side of marinara for dipping, but this is totally optional.


1 14 oz can artichoke hearts (I used the marinated kind)
2 green onions chopped
2 cloves garlic minced
4 oz cream cheese (room temperature)
1/4 C mayonnaise
1/2 C sour cream
1/2 C mozzarella grated
1/4 C parmigiano reggiano (grated)
1 loaf crusty bread (I used my baguette recipe, but just made one large loaf so I could slice it)
marinara (optional)

Mix the artichoke hearts, green onions, garlic, cream cheese, mayonnaise, sour cream, mozzarella and parmigiano reggiano reserving some of the cheese.

Halve the bread, and hollow 1/2 an inch out of the center of both halves of the bread.

 Spread the mixture into the hole in the bread slices and top with the reserved cheese.

 Bake in a preheated 350F oven covered in foil for 20 minutes.

Remove the foil and continue to bake until the cheese is melted and golden brown.

Serve warm, with a side of warmed marinara.

Until tomorrow...Peace.
Pin It Now!

Wednesday, April 25, 2012

Ooh child things are gonna get easier...

I do not crave many things, but every now and again I crave mussels. My preferred cooking method for these delights is the traditional Spanish method. In Spain, they are consumed mostly steam cooked, sometimes boiling white wine, onion and herbs, and served with the remaining water and some lemon. I chose to season them with fresh parsley, fresh thyme, and the juice of one orange. The orange gave a unique and sweet citrus addition. The only accompaniment needed was a warm baguette and lemon wedges. These are delicious warm, but may also be served at room temperature.


Often people attempt to live their lives backwards; they try to have more things, or more money, in order to do more of what they want, so they will be happier. The way it actually works is the reverse. You must first be who you really are, then do what you need to do, in order to have what you want.
~Margaret Young


2 lbs mussels, cleaned
3 garlic cloves minced
3 shallots sliced
1 14 oz can diced tomatoes
1/2 C chopped fresh parsley
1 T chopped fresh thyme
1 t black pepper
2 C white grape juice (or white wine)
juice of 1 orange
1 lemon cut into wedges


In a large stockpot saute garlic and shallots in olive oil. Add tomatoes and grape juice, bring to a slow boil. Add in mussels, cover and cook 3-4 minutes until mussels have opened. Remove from heat, stir in herbs, pepper, and orange juice. Serve in a bowl with juices and lemon wedges.

Until tomorrow...Peace.
Pin It Now!

Monday, April 23, 2012

It's time for a few small repairs, she said...

Unfortunately when I get something in my head it is not easily forgotten. I have been thinking about fried chicken for awhile now. I keep saying to myself, "it's unhealthy, it makes a mess of the kitchen, there are so many other ways to fix chicken." Well, Sunday morning I was watching the food network and Guy Fieri was fixing fried chicken, and then I went to the grocery store and smelled the deli fried chicken; at this moment I threw my arms in the air and surrendered to the notion. I quickly pushed my cart to the poultry section, and bought a whole chicken to FRY. I am not all that familiar with frying my own chicken, it is something that always seemed easier to purchase. I must admit this was not a strenuous process, just numerous steps. I prepared a simple spicy coleslaw, packed with jalapenos. Naturally, I made this into a sandwich, by far the best fried chicken sandwich I have ever eaten. I will let you be the judge.


1 whole chicken ( cut into pieces), I also did a couple extra breasts for sandwiches
Kosher salt to taste
1 quart buttermilk
1 pound all-purpose flour
1 T cayenne pepper
1 T kosher salt + more to taste
1 1/2 t freshly ground pepper
vegetable oil, for frying


Season chicken breasts with kosher salt. Let sit at least 5 minutes. Fill a wide, shallow bowl or casserole dish with buttermilk. Add the chicken and soak in the refrigerator for 1 hour up to overnight.


To fry chicken, pour vegetable oil into a large stockpot. Do not fill up more than halfway, or the oil could splatter. Bring oil up to 365°, or until when a speck of flour is dropped in it bubbles. Prepare the breading while waiting for oil to heat up.

In a wide shallow bowl, mix flour, cayenne, salt and pepper. Pull a piece of chicken out of the buttermilk, letting excess drip off, and dredge completely in flour. To create a thick crust, place in buttermilk and dredge in flour a second time. Do not drain or shake off excess buttermilk or flour during the breading process.

When the oil is at 365°, carefully place chicken pieces into oil one by one. Let it cook for a minute before disturbing chicken, then help it in the oil with tongs, until it is evenly cooked, about 5-7 minutes. Remove chicken from oil and drain on paper towels. Season immediately with salt.


1 T Dijon mustard
3 T red wine vinegar
1 t kosher salt
1/2 cup extra virgin olive oil

1 small red onion, very thinly sliced
1 cup red wine vinegar
4 jalapenos, seeded, cut in half and sliced crosswise (you may use less if you don't want to much heat)
1/4 cup chopped parsley
1/2 green cabbage, core and outer leaves removed, and very thinly sliced
Kosher salt


For the coleslaw, macerate onions in red wine vinegar, and let sit at least 20 minutes. Remove onions and discard vinegar. Toss onions with jalapeno, parsley, cabbage and salt. Toss with vinaigrette until evenly coated.

Until tomorrow...Peace.
Pin It Now!

You have to go where your heart says go, isn't that so...

Happy Earth Day!! (Yes, I realize it was yesterday. Last evening a Florida rain storm took out my Internet. I guess that is what I get for procrastination. Now, you may just be lucky enough to receive two posts today.) Panzenalla, my new obsession. Panzanella or panmolle is a Florentine salad of bread and tomatoes popular in the summer (tomatoes are in season in FL now). It includes chunks of soaked stale bread and tomatoes, sometimes also onions and basil, dressed with olive oil and vinegar. It is also popular in other parts of central Italy. Panzanella was based on onions, not tomatoes, until the 20th century. I have been experimenting with different variations of this delicious salad. While at the vegetable market my eyes were drawn to gorgeous fresh peaches. If you cannot find good quality fresh peaches they may be omitted, or you may substitute plums or nectarines (use your imagination I think mango would be excellent here as well, just do not grill it.). I chose to grill the peaches to create a sweeter version of panzenella. This was a huge hit! I grilled some romaine hearts in addition, and it made for a delicious vegetarian lunch, dinner, or side dish.


2 shallots, halved and sliced paper thin
2 to 3 T red wine vinegar
1 1/2 pounds sweet cherry tomatoes, halved (or any tomato that looks good)
6 T extra virgin olive oil
1 garlic clove, sliced paper thin
1 1/2 pounds ripe peaches, cut into sixths
3/4 pound herbed  bread, into 1-inch slices (I used stale foccacia, any hard bread will work)
dash of balsamic vinegar (I used fig infused, but any would work)
1 handful fresh basil leaves


Heat a grill to medium heat. Meanwhile, combine shallots and 2 tablespoons of the vinegar in a small bowl, season with a pinch of salt and a pinch of sugar, stir to combine, and set aside for at least 10 minutes. In a large bowl, combine tomatoes, garlic, and 3 tablespoons of the oil, season with salt, toss to combine, and set aside.

Brush bread on both sides with 1 tablespoon of the remaining oil, place on grill, and cook until charred on both sides, about 5 minutes. Set bread aside to cool slightly. Brush peaches with remaining 1 tablespoon of oil, season with salt, and and grill, cut-side down, until just charred on both sides but still firm, about 3 minutes. Remove from heat and set aside.

When bread is cool enough to handle, cut or tear into bite-sized pieces. Add the shallots and vinegar to the bread and toss to coat. Just before serving, add the tomatoes to the bread mixture, season with salt and freshly ground black pepper, taste, and drizzle with remaining tablespoon of oil or vinegar, as desired. Thinly slice basil and scatter over the top then place salad on a serving plate and reserve any remaining dressing. Add peaches to remaining dressing and gently turn to coat. Top salad with peaches, drizzle balsamic vinegar and serve.

Until tomorrow...Peace.
Pin It Now!

Saturday, April 21, 2012

I'm a lucky man to count on both hands the one's that I love, some just have one...

Today, a classic with a twist (or course), the shrimp cocktail. It is said to have originated in Great Britain, and was traditionally served with a mayonnaise and tomato based cocktail sauce. Later Americans adapted the cocktail sauce we are familiar with, ketchup and horseradish. I have enjoyed shrimp cocktails since I was a child. For my shrimp cocktail I marinated them briefly in an orange chipotle sauce prior to placing them on the grill. This added a nice bright bite. I then chilled them as with a conventional shrimp cocktail. I have included a recipe for a spicy citrus cocktail sauce. I served this cocktail with basic garlic hassleback potatoes (recipe below), and a wedge salad with fresh ranch dressing. This meal comes together quickly, and is excellent for a warm evening, date night, or cocktail party. 


Grilled Shrimp Cocktail with Chipotle Orange Cocktail Sauce
1 lb jumbo shrimp, peeled and deveined
3 T chopped fresh cilantro or parsley
2 garlic cloves, minced
1 t minced canned chipotle chile in adobo, plus 1 to 2 t adobo sauce from the jar or can
Coarse salt (kosher or sea) and cracked black pepper
2 T olive oil
2 T fresh lime juice


Cocktail Sauce


1 C ketchup
6 T fresh orange juice
2 T fresh lime juice
1 T Worcestershire sauce
1 to 2 chipotle chilies, minced, plus 1 to 2 teaspoons can juices
1 T prepared horseradish
Salt and freshly ground black pepper
3 T diced white onion
6 sprigs fresh cilantro
lime wedges for serving


Place the shrimp, cilantro or parsley, garlic, minced chipotle with juices, salt and pepper in a mixing bowl and toss to mix. Stir in the oil and lime juice and let marinate for 30 minutes.


Meanwhile, place the ingredients for the cocktail sauce in a mixing bowl and whisk to mix. Correct the seasoning, adding salt or lime juice to taste.


Set up your grill for direct grilling and preheat to high. Thread the shrimp onto skewers. I suggest grilling on foil with holes poked in it, or on a grill pan. Grill the shrimp until cooked through, about 2 minutes per side.


 Place a bowl of sauce on the plate and top with a sprinkling of onion and cilantro sprig. The shrimp can be served hot or cold.


Hasselback Potatoes


3 medium-sized potatoes, scrubbed clean
3 cloves garlic, very thinly sliced
1 T olive oil
2 T cold unsalted butter, cut into little pieces
Kosher salt
freshly ground black pepper
blue cheese optional

Preheat oven to 425 degrees. Put the potatoes down on a cutting board, flat side down (if you need to take a tiny slice off the bottom of the potato so it'll lay flat, go ahead and do that). Starting at one end of the potato, very carefully slice into the potato, almost all the way through, small intervals. Insert garlic slices and tiny bits of butter between the slits.


Put the potatoes on a baking sheet, and drizzle 1 tsp olive oil over each potato. Sprinkle each potato lightly with salt and pepper.


Bake for about 40 minutes, until the tops of the potatoes are browned and crisp and the potato is soft when poked with a fork at the bottom. Serve immediately. If using blue cheese sprinkle on before serving.


Until tomorrow...Peace.

Pin It Now!

Thursday, April 19, 2012

Hey there little red riding hood...

I adore eggplant. A preferred favorite among eggplant lovers is eggplant Parmesan, while this is delicious it leaves something to be desired in the healthy category. The recipe I present today is not fat free, but is an honorable attempt at a healthier option while not sacrificing any flavor. I came across a recipe for rolled eggplant, while I was intrigued by the concept I felt some enhancement was needed. I have abundant mint growing in the yard, and am continually searching for ways to incorporate in into my cooking. I chose to stuff my eggplant rolls with Swiss chard and mint in addition to the usual cheese. This provided a fresh brightness that worked gorgeously with the melted cheese and tender eggplant. The product I created could possibly be my new favorite eggplant dish. Once the rolls are prepared they may be baked immediately, or the next day. This is an excellent vegetarian dinner option. 


Eggplant Parmesan Rolls with Swiss Chard and Mint
<>

 
Ingredients:


2 medium eggplants (about 2 1/4 pounds total), trimmed, cut lengthwise into 1/4-inch-thick slices
Coarse kosher salt
Extra-virgin olive oil
1 1-pound bunch Swiss chard, center ribs removed
2 large eggs
1 15 oz container whole-milk ricotta cheese
1 1/4 C finely grated Parmesan cheese, divided
3 T chopped fresh mint
1 t freshly ground black pepper
1 t red pepper flakes
dash of grated nutmeg
1 15- to 16-ounce can good quality tomato sauce (I used low sodium) 
1 8-ounce ball fresh mozzarella, thinly sliced


Directions:


Place one layer of eggplant slices along the bottom and sides of 2 large colanders (or do this in batches). Sprinkle the eggplant slices with a generous amount of kosher salt. Add another layer of eggplant slices on top of the first and salt again, repeat this layering until all of the slices are used up. Set the colanders in the sink or place each in a large bowl to catch the liquid that will drain off. Let the eggplant slices stand for 30 minutes to 1 hour. Then rinse off the eggplant slices to get rid of the salt and dry each slice thoroughly with paper towels. (It seems like alot of work, but this is important.)


Pre-heat the broiler in your oven with a rack 5 to 6 inches below the heat source. Line 2 (this may take 3 rounds) rimmed baking sheets with parchment paper. Place the eggplant slices in a single layer on the baking sheets, and brush each side of the slices with olive oil. Place one sheet at a time underneath the broiler, watching closely, and cook until the eggplant just starts to turn brown, about 3 minutes. Using tongs carefully turn over the eggplant slices, cook for another 3 minutes until the second side is brown. Repeat the process with the remaining eggplant. Let the eggplant slices cool while you make the filling.


Place a large pot of salted water over high heat. When the water is boiling, add the Swiss chard to the pot and boil until it is just tender, about 2 minutes. Drain the chard into a colander, and then rinse it with cold water. Pick up the chard and squeeze out all the excess water you can. It will form a small tight ball. Place the chard on a cutting board, and chop it coarsely. Wrap the cut chard in paper towels, and squeeze it again to remove any leftover moisture.


In a medium bowl, whisk together the eggs and a pinch of coarse salt. Stir in the chopped chard, ricotta cheese, 1 cup of Parmesan, mint, and black pepper.


Lightly coat the inside of a 15x10x2 baking dish with oil. Pour half of the tomato sauce into the dish, and spread it evenly across the bottom. Layout an eggplant slice lengthwise on a clean surface, place 1 heaping tablespoon of the chard-ricotta filling about 1/3 up from the bottom of the slice. Starting at the bottom, loosely roll up the eggplant slice, enclosing the filling. Place the roll seam side down, on top of the sauce in the baking dish. Repeat this process until all of the eggplant slices are filled. Spoon the rest of the tomato sauce on top of the rolls. Place the mozzarella slices evenly across the top of the casserole, and then sprinkle the remaining 1/4 cup of Parmesan cheese on top. If you are doing this dish 1 day ahead- cover tightly with foil, and then chill.


Pre-heat the oven to 350°F with a rack in the middle. Leave the foil cover in place, and bake the eggplant Parmesan rolls until they are heated through (30 minutes if just made, 40 minutes if made the day before). After they are heated through, remove the foil cover, and continue to bake until the cheese turns brown in spots and the tomato sauce is bubbling, another 15-20 minutes. Serve the rolls hot, spooning any excess sauce onto the plate.


Until tomorrow...Peace.
Pin It Now!

Wednesday, April 18, 2012

We look at each other wondering what the other is thinking, but we never say a thing...

I bring you another soup today. Avgolemono or egg-lemon is a family of Mediterranean sauces and soups made with egg and lemon juice mixed with broth, heated until they thicken. As a soup, it usually starts with chicken broth, though meat (usually lamb), fish, or vegetable broths are also used. Typically, rice, orzo, pastina, or tapioca are cooked in the broth before the mixture of eggs and lemon is added. Its consistency varies from near-stew to near-broth. It is often served with pieces of the meat and vegetables reserved from the broth. I have eaten this soup at Greek restaurants, but this was my first attempt at home. This soup is easy to prepare, and makes a nice quantity large enough to have some in reserve.


1 whole chicken, about 3 1/2 lbs. with excess fat trimmed and breast skin removed
12 cups water
2 carrots cut in half
2 celery stalks, cut in half
1 large onion, peeled and cut in half
2 bay leaves
5 whole black peppercorns
2 tsp. salt
1/2 cup orzo pasta, or rice
3 eggs, at room temperature
1 tsp. fresh lemon zest
Juice of two lemons, strained
Salt and freshly ground black pepper


Add first eight ingredients to a large stockpot. Bring the water to a rapid boil, lower heat to medium low and simmer partially covered for approximately an hour to an hour and a half.

Remove the chicken and vegetables to a bowl and carefully strain the broth into a large bowl. Return the strained broth to the stockpot and bring to a boil.

Add the orzo pasta and cook, uncovered for approximately 10 – 12 minutes until tender.

While the pasta is cooking, prepare the egg-lemon mixture. Using a whisk beat the eggs until nice and frothy. Add the lemon zest and the lemon juice in a steady stream while continuing to whisk.

When the pasta has finished cooking, turn off the heat. Ladle about two cups of broth into a bowl or large measuring cup. Slowly add the hot broth to the egg-lemon mixture while continuing to whisk.
This will temper the eggs and prevent them from curdling once they are added to the hot broth.

Stir the egg-lemon mixture into the pot and heat over very low heat for approximately 5 -10 minutes until heated through. Be careful not to boil the soup once the eggs have been added.

Adjust your seasoning for salt and pepper and add more as desired.

Traditionally, this soup is served without the chicken meat or vegetables. You can add them back or serve on the side as you prefer (I added mine in).

Until tomorrow...Peace.
Pin It Now!

Monday, April 16, 2012

That's me in the corner, that's me in the spotlight...

Today is soup day. I am delivering you a hearty, healthy and satisfying dish. Pasta e fagioli is a conventional Italian soup. This soup is traditionally meatless, as it simply means pasta and beans. It was an inexpensive dish that was created to feed a large family. I have decided to give it an added twist with hot Italian sausage. I was pleased with the outcome. The sausage delivered an additional depth that was welcoming. This serves as an excellent first course, or easily as a  generous meal.


3 cloves of fresh garlic minced
1 onion diced
1 tbsp olive oil
1 tsp sugar
1 – 28 oz. can  tomatoes
2 cups water (you could also use 1 cup water, 1 cup chicken broth if you have it on hand)
1 – 6 oz. can tomato paste
2 cans of white cannellini beans (with the starch)
3/4 lb hot Italian sausage
1/2 lb ditallini pasta
Salt and pepper to taste
1 T fresh basil
1 T fresh parsley
3 bay leaves (fresh if available)
Parmesan cheese (Optional: mix in 3/4 cup grated parmesan into the soup at the end)
heavy cream (a dash at the end of the cooking process)


Remove the sausage from its casing and brown it in the bottom of a large soup pot


Chop up the fresh garlic and onion and saute it with the sausage in the pot with 1 tbsp olive oil and 1 tsp sugar – add the onions first, then the garlic to avoid burning the garlic


Add in the  tomatoes, tomato paste and 2 cups of water


Season with salt, pepper, basil, and parsley


Simmer the contents of the pot for 30-40 mins (bring it to a boil and then reduce to medium-high heat)


While the soup is simmering, cook the dittalini in a separate pot


Once the soup has simmered for 30-40 minutes, add in the 2 cans of cannellini beans with the starch and the pasta


Reduce heat to low and let the soup cook for another 10 minutes – at this point add cheese and cream to the soup

Until tomorrow...Peace.
Pin It Now!

Saturday, April 14, 2012

The good old days weren't always good and tomorrow ain't as bad as it seems...

I have been rather skeptical of scones, as often I discover them to be dry and dense. There popularity was intriguing to me, so I set out on a mission to create a moist light scone. Voila!! Unlike my usual approach I chose to initiate this quest with minimal ingredients, upon tasting them I would not change a thing. The secret to these delicious bites is abundant amounts of butter. Now, while I realize they are not the most beautiful scones, this small notion may easily be overlooked once tasted. The main player in the scones is vanilla beans (I purchase mine at a store that sells spices wholesale, allowing me to decide how much I need. The beans are MUCH more affordable this way, and the freshness is superior.) It is crucial to use the bean in this recipe as opposed to extract. This is the most pure form of vanilla, and eliminates the alcohol aftertaste sometimes provided from extract. I recommend these for your Sunday brunch, with a strong pot of tea.


Ingredients

Scones:

2 whole vanilla beans
3/4 cups heavy cream
3 cups all-purpose flour, plus more for dusting
2/3 cups granulated sugar
5 teaspoons baking powder
1/4 teaspoon salt
2 sticks (1/2 pound) unsalted butter, chilled
1 whole large egg


Glaze:

1 whole vanilla bean
1/2 cup  milk, plus more if needed
5 cups powdered sugar, sifted, plus more if needed
Dash of salt


For the scones: Preheat the oven to 350 degrees F. Split the vanilla beans in half lengthwise and scrape out all the vanilla "caviar" inside. Stir the caviar into the cream. Set aside for 15 minutes.


Sift together the flour, granulated sugar, baking powder and salt. Cut the cold butter into pats, and then use a pastry cutter or two knives to cut the butter into the flour. Keep going until the mixture resembles crumbs.


Mix the vanilla cream with the egg, and then combine with the flour mixture. Stir gently with a fork just until it comes together.


Turn the dough onto a floured surface and lightly press it together until it forms a rough rectangle. (Mixture will be pretty crumbly.) Use a rolling pin to roll into a rectangle about 12-by-7 inches and 1/2-to-3/4-inches thick. Use your hands to help with the forming if necessary. Then cut the rectangle into 12 symmetrical squares/rectangles. Next, cut each square/rectangle in half diagonally, to form two triangles. Transfer to a parchment or baking-mat-lined cookie sheet and bake for 18 minutes, removing from the oven just before they start to turn golden. Allow to cool for 15 minutes on the cookie sheet, and then transfer to a cooling rack to cool completely.


For the glaze: Split the vanilla bean in half lengthwise and scrape out the caviar. Stir the caviar into the milk. Set aside for 15 minutes.


Mix the powdered sugar and salt with the vanilla milk, adding more powdered sugar or milk if necessary to get the right consistency. Stir or whisk until completely smooth.


One at a time, carefully dunk each cooled scone in the glaze, turning it over if necessary. Transfer to parchment paper or the cooling rack. Allow the glaze to set completely, about an hour. Scone will keep several days if glazed.


Until tomorrow...Peace.
Pin It Now!

Thursday, April 12, 2012

Many times I've gazed along the open road...

Today I am bringing you salmon. A thin glaze of honey mustard, abundant amounts of fresh dill and sliced lemons were the only elements needed to transform this fish into a true delight. As you are aware of my sandwich obsession, I enveloped the salmon into a pita with fresh veggies and an herb yogurt sauce. This fish could certainly be eaten alone, or alongside a lemon rice pilaf. This is a wonderful light spring dinner, and there are countless options for the fish with this delicious glaze. I also had thoughts of placing the baked fish on a bed of fresh greens with a light lemon vinaigrette.


For the salmon:


salmon fillet
fresh dill
1 lemon sliced
3 T prepared honey mustard (I used a variety for sandwiches)
salt and pepper 
olive oil


Drizzle salmon with olive oil. Season with salt and pepper, brush on honey mustard, sprinkle dill and lemons. Bake at 350 until fish is opaque.


For the yogurt sauce:


1 C Greek yogurt
2 T lemon juice
1 T fresh dill
1 T fresh thyme
1 T Tabasco
2 T finely chopped dill pickles
salt and pepper


Combine all ingredients and chill.


Until tomorrow...Peace.
Pin It Now!