Saturday, March 31, 2012

I love you like a fat kid loves cake...

A crust eaten in peace is better that a banquet partaken in anxiety. 
 -Aesop


This is a rather abbreviated post, as the tart below conveys it's own beauty. I have formerly posted pastry cream, but maintaining it's deliciousness I concluded it was deserving of a second. This is a contrasting variation of berries to provide you some new ideas. I served this tart after a meze feast, it was a satisfying bright treat late in the evening. I assure when you present this tart your guests will depart with warm hearts.


Berry Tart with Pastry Cream


5 egg yolks, room temperature
3/4 C sugar
3 T cornstarch
1 1/2 C scalded milk
1/2 t pure vanilla extract
1 T unsalted butter
1 T heavy cream
Pate Brisee (recipe on post titled: You may ask yourself how did I get here? 2.21.12)
fruit for topping (any kind you like)
3 T apricot or orange marmalade (for glazing)


Bake Pate Brisee according to instructions, make sure edges become browned as you will not be baking this tart once it is filled. Set aside to cool.


In the bowl of an electric mixer fitted with the paddle attachment, beat the egg yolks and sugar on medium-high speed for 4 minutes, or until very thick. Reduce to low speed, and add the cornstarch.


With the mixer still on low, slowly pour the hot milk into the egg mixture.


Pour the mixture into a medium saucepan and cook over low heat, stirring constantly with a wooden spoon, until the mixture thickens, 5 to 7 minutes. Don't be alarmed when the custard comes to a boil and appears to curdle; switch to a whisk and beat vigorously. Cook, whisking constantly, for another 2 minutes; the custard will come together and become very thick, like pudding. Stir in the vanilla, butter, and heavy cream. Pour pastry cream into tart shell, or place plastic wrap directly on the custard and refrigerate until cool.


Fill pastry shell with custard. Arrange fruit on top. Heat marmalade over medium low heat until runny. Brush warm marmalade over fruit and edges of tart. Refrigerate before serving.

Until tomorrow...Peace.
Pin It Now!

Friday, March 30, 2012

I'm just a soul whose intentions are good...

The allure of pasta lies in it's ease. I normally prepare an oversized pot of marinara, and then freeze it in smaller containers so that it is consistently readily available. This is a trick I highly recommend, as the uses for the sauce are boundless. Pasta is just the start it could also be utilized as pizza sauce, dipping sauce, or as a base for baked chicken. So, today I took a container of marinara and jazzed it up with hot Italian sausage (out of the casing), pancetta, green onions, mushrooms, Parmesan, and a splash of cream. It delivered a salty satisfaction that was rounded out with sweetness from the tomatoes. It appeared as if it came out of an Italian trattoria kitchen, but was practically effortless. Paired with a garden salad and crusty bread, this meal is worthy of entertaining. For variations, you could use mild Italian sausage or leave out the pancetta.


Italian Sausage and Pancetta Pasta


1 lb ziti pasta (or any shape you like)
1/2 lb hot Italian sausage, loose
1/4 lb pancetta, diced
1 C mushrooms
1 green pepper diced
2 C marinara (recipe follows)
1/3 C finely grated Parmesan Reggiano
2 T heavy cream
1 T chopped oregano
crushed red pepper (optional)
salt and pepper to taste


Brown sausage with pancetta over medium heat, set aside. Saute mushrooms and pepper over medium heat in 2 T olive oil, add meat and marinara. Season with salt and pepper to taste. Warm over low heat, while you start pasta water.


Cook pasta al dente, according to the package. Reserve 1/4 C pasta water. Toss pasta in skillet with sauce and meat, add a dash of water if sauce needs thickened. Stir in cheese and cream then top with chopped oregano and optional crushed peppers.


Marinara

2 28oz cans San Marzano tomatoes, crushed
1 large onion diced
3 garlic cloves minced
1 T fresh oregano
1 T fresh thyme
1 t baking soda (to cut acidity)

Saute onions and garlic, add remaining ingrredients and simmer for 1 hour.

Serve with crusty bread.


Until tomorrow...Peace.
Pin It Now!

Thursday, March 29, 2012

Joy to the fishes in the deep blue sea...

It's burger time! An all American vintage treat that pleases all demographics. Unfortunately this sandwich has gained an unpleasant reputation due to the popularity of fast food chains. It is commonly credited with being a chief contributor to the countries obesity problem. While as this is not a diet food, I am here to speak on behave of this classic delight. As with many goods I recommend indulging in a juicy burger at home. This allows me to control the beef, and what is placed on top. I attempt to solely consume local or organic meats, this grants me the knowledge of what the animals are fed, how they are treated and slaughtered. This is the first considerable step to a quality burger, next a homemade bun. Continuing on the path of no mass produced bread, I have written a bun recipe I am confident you will enjoy. Another important element to the perfect burger is a grill, I am a firm believer that all burgers should be grilled. Now, the fun commences, you have free range of toppings. My delicious burger consisted of caramelized onions, sauteed mushrooms and jalapeno, cheddar and blue cheese (I realize I gilded the lily here) and of course Tabasco. I also had sliced tomatoes on the side (I am not sure if I was attempting to make myself feel better about eating this giant burger, nonetheless they were a pleasant addition). Once you have the necessities, beef patty and bun, the selection is in your hands as to what flavor approach you desire.


Homemade Hamburger Buns


1 1/2 Cups  milk
8 Tbs unsalted butter, cut into 8 pieces
1 packet instant yeast
4 cups all purpose flour, plus more for dusting
2 Tbs sugar
1 Tbs kosher salt
1 egg beaten with 1 tsp water
sesame seeds for sprinkling (optional)


In a small saucepan over medium heat, combine the milk and butter and heat until the butter is melted, about 7 minutes.


In the bowl of a stand mixer fitted with the dough hook, combine the 4 cups of flour, yeast, the sugar and salt and beat on low speed until combined, about 30 seconds. Add the milk mixture and knead until the dough forms a ball, about 1 minute. Increase the speed to medium low and knead until the dough is smooth and elastic, 4 to 5 minutes. Remove the dough from the bowl, oil the inside of the bowl and return the dough to the bowl. Cover tightly with plastic wrap and let the dough rise in a warm place until doubled in volume, about 1 hour.


Line a baking sheet with parchment paper. On a lightly floured work surface, roll out the dough into 12 equal balls. Transfer to the prepared baking sheet, spacing the buns evenly apart, and cover tightly with plastic wrap. Let rise in a warm place for 30 minutes. 


Preheat oven to 400'F


Remove the plastic wrap from the baking sheet. Brush the tops of the buns with the egg mixture (I brushed the tops with milk) and sprinkle with sesame seeds if using. Bake until the buns and golden , 14 to 16 minutes. Transfer the buns to a wire rack and let cool completely. Cut in half and use as hamburger buns. Makes 12 hamburger buns.
My Pumped Up Burger (in the pic)
1/4 medium onion, sauteed
1 jalapeno sauteed
handful of baby bella mushrooms sauteed
sharp cheddar
dollop of blue cheese
sliced tomatoes on the side
Tabasco sauce

Until tomorrow...Peace.
Pin It Now!

Wednesday, March 28, 2012

All the lovely people, where do they all come from?...

The Greek salad, a front-runner in the salad race, salty, crisp, fresh and bright. This salad is tossed with a vinaigrette infused with an abundance of oregano. The oregano grants this salad multiple sweet undertones, while a supplemental element of the dressing, red wine vinegar, provides a briny tang. A touch of heat is to be had with the selection of pepperoncinis. Salty olives and feta cheese grace the top of this gorgeous salad. In some regions it is traditional to place potato salad directly in the center of a Greek salad. This is how I chose to arrange my salad. The potatoes are also prepared with a very basic vinaigrette, and loads of fresh minced garlic. This salad forms an excellent entree on it's own, as it is wholesomely satisfying, but could very well be the needed addition to a picnic you have been searching for. Proper marination is granted when the potato salad is prepared a day in advance. Grilled marinated meat of your choice would sit along side this dish lovely for additional depth.


Greek Salad with Potatoes


2 Romaine hearts chopped
1/2 red onion sliced
1 green pepper sliced
pepperoncinis
green olives
1/2 C crumbled feta


Dressing:


1/2 C olive oil
2 T red wine vinegar
1 T dried oregano
2 t sugar
salt and pepper


For the potatoes:


1 lb potatoes
4 garlic cloves chopped
1 T chopped fresh oregano
1 t dried oregano
1/2 C vegetable oil
2 t sugar


Boil potatoes, allow to cool then dice. Toss with other ingredients. Refrigerate overnight before serving atop the salad.


Until tomorrow...Peace.
Pin It Now!

Tuesday, March 27, 2012

The words of the prophets are written on the subway walls...

Sauteed onions and fennel are the opening of this Provencal grilled chicken. This chicken recipe is precisely warm and inviting. It combines fresh flavors such as tomatoes and tarragon with earthy tones from balsamic vinegar and herbs de Provence. Herbes de Provence is a mixture of dried herbs typical of Provence. Formerly simply a descriptive term referring to herbs typical of Provence, in the 1970s, commercial blends started to be sold under this name. The standard mixture typically contains savory, fennel, basil, thyme, and lavender flowers, though lavender was not used in traditional southern French cooking. This divine relish candidly sits atop grilled chicken, and tastes delicious at room temperature. As opposed to Parisian fare, southern French cuisine is usually prepared without sauces, and this is the perfect example. While eating this entree I become transported to the French countryside. I recommend a crusty baguette as a pleasant accompaniment. You will calmly be able to prepare this meal in under 30 minutes, which provides you time to relax and savor this delectable chicken.


Avignon Chicken

2 boneless chicken breasts, butterflied
1 fennel bulb, sliced (reserve fronds)
1 large onion sliced
2 cloves garlic minced
1/2 C cherry tomatoes
1 T fresh tarragon chopped
1 T herbes de Provence
1 T balsamic vinegar
olive oil
salt and pepper to taste

Heat 3 tablespoons olive oil in a saute pan over medium heat, add onions fennel and garlic. Saute until translucent. Add cherry tomatoes, herbes de Provence, vinegar, and more oil if needed. Cover. Allow to cook until tomatoes have burst open. Stir in tarragon, season with salt and pepper to taste.


Drizzle the chicken with olive oil, liberally season with salt and pepper. Grill until thoroughly cooked.

Smother sauteed veggies over chicken, drizzle with extra virgin olive oil, sprinkle reserved fennel fronds on top, serve family style.

Until tomorrow...Peace.
Pin It Now!

Monday, March 26, 2012

The wheel in the sky keeps on turnin'...

Today I am handing over a delicious lineup for a Mediterranean meze that is vegetarian. First Spanikopita, or spinach pie, is a Greek savory pastry. It belongs to the burek family of pastries with a filling of chopped spinach, feta cheese, onions, and spices (I added mushrooms). Secondly, deep fried falafel balls made from chickpeas. These are believed to have originated in Egypt as an alternative to meat during lent. Today they are widely popular as street food, often served in pitas with sauce. Lastly, stuffed peppers adorn the table. These peppers have a combination of artichokes, feta, ricotta, bountiful amounts of oregano and cream cheese. I chose to use hot peppers, therefore the cheese acted as a cooling agent. All of these items may be prepared in advance, and then reheated prior to being served. I have also injected recipes for tzatziki (which I have used in previous posts) and a yogurt based smokey red pepper sauce. Both sauces may accompany all the hors d'oeuvres presented. I served these with homemade flatbread and pita alongside hummus. Garnishes such as tomatoes, red onions, pepperoncini, or olives are an attractive idea for visitors that would consider relishing a falafel pita. You will discover these recipes simple to prepare, and leading crowd pleasers. I encourage you to invite a few friends over for a Mediterranean cocktail party.


Spanikopita


1 box frozen phyllo sheets, thawed
2 bags frozen spinach, thawed and squeezed
1 medium onion diced
2 C baby bella mushrooms chopped
3 garlic cloves chopped
1 C feta crumbled
1/4 C ricotta cheese
1 egg
dash of grated nutmeg
3 T butter melted
salt and pepper

Saute onions, garlic, and mushrooms in 2 tablespoons olive oil over medium heat until translucent and tender. Season with salt and pepper.


Combine cooked veggies with spinach, cheeses, ricotta, egg and nutmeg.


Take one sheet of phyllo at a time, keep others covered with a damp cloth. Fold the sheet into half then half again (2 folds) vertically. Take 1 hefty teaspoon and place in the top right corner (this will seem like alot of filling). Fold diagonally to make a triangle. Then fold the triangle down, then to the right. Keep folding following this pattern, until all sides are sealed more than once. If there is still phyllo when you feel that it is sealed properly you may trim the excess. Melt butter and brush on all sides, place on a baking sheet. Continue until filling is gone. Bake at 350 for 10-12 minutes, until golden and crispy.


These are bite size, but may easily be made larger simply use 2 sheets instead of 1. Then only fold in half once. Continue with instructions and bake accordingly. If you do not want to deal with the phyllo, you may purchase the pre-made phyllo shells and place the filling inside before baking.


These may be made ahead and preheated in the oven at 200 degrees.


Fried Falafel Balls


1 can chickpeas, rinsed and drained
1 egg
1 small onion diced
1 serrano pepper diced
2 cloves garlic diced
2 T chopped fresh cilantro
2 T chopped fresh parsley
juice of 1 lemon
2 t ground cumin
salt and pepper
vegetable oil for frying


Saute onions, garlic, and pepper in 2 tablespoons olive oil over medium heat until translucent and tender.


Combine chickpeas, sauteed veggies, herbs, lemon juice, egg, and cumin in a food processor and process until smooth. Taste and season with salt and pepper accordingly.


Place dollops of 1 T on a baking sheet lined with parchment paper (the mixture will be fairly loose). Cover and place in freezer for 30-60 minutes. Heat 2 1/2 inches of oil, fry in batches until golden and crisp, about 4 minutes. Place on paper towels to drain excess oil.


These may be made ahead and preheated in the oven at 200 degrees.


Tzatziki Sauce

1 C plain Greek yogurt
1/2 large cucumber grated
3 cloves garlic grated
1 T fresh chopped dill
1 T fresh chopped mint
juice of one lemon
salt and pepper to taste


Combine all ingredients.


Yogurt Pepper Sauce

1 C plain Greek yogurt
1 roasted red pepper
2 cloves garlic grated
2 t smoked sweet paprika
2 t lemon juice
salt and pepper to taste
Combine all ingredients in a food processor and process until smooth.


Greek Stuffed Peppers


5-6 jalapeno peppers
5-6 hot Hungarian wax peppers
1 C cream cheese
1/2 C feta cheese crumbled
1/2 C ricotta cheese
1 C chopped artichokes
1 T chopped fresh oregano
1 T dried oregano


Cut tops off pepper, take out ribs and seeds. Combine all other ingredients in a bowl. Stuff each pepper. Place on baking sheet. Chill in the freezer for 20 minutes, so inside mixture becomes firm. Bake at 375 for 20 minutes, until peppers seem soft. If some filling spills out, that is ok just pile it on top of the peppers.
salt and pepper


Until tomorrow...Peace.

Pin It Now!

Sunday, March 25, 2012

We won't get fooled again...

While on my bread baking journey I have noticed a large void, hoagie rolls. I have previously made my love known in regard to large sandwiches. So, it appeared necessary to create a quality roll recipe. After much research and experiment, I presume you will discover this post to be highly inviting. These rolls are hard on the outside, and subtle on the inside. I shaped them into a medium size, but you could very easily make them footlong. These are the perfect envelopes to carry a cheesesteak, Cuban, club, meatballs, etc. As with my various bread recipes, these freeze beautifully. So, I suggest baking a batch and venture into delicious sandwich fillings. This would be a prime addition to a March Madness party. If your friends are so lucky they will be thanking you.


Hoagie Rolls
1 1/2 tsp. (about 1/4 oz) active dry yeast
1 1/2 cups warm water, divided
2 tsp.. sugar, divided
2 tbsp. olive or vegetable oil
2 tsp. kosher salt
2 cups bread flour
2 cups all-purpose flour

Directions

In a small mixing bowl, add yeast to 1/4 cup water. Sprinkle 1 tsp. sugar over the mixture and let sit for 5 minutes, or until frothy/foamy. Add remaining 1 1/4 cups water and 1 tsp. sugar. Add oil and stir to combine.
Combine salt and flours in a medium mixing bowl. Using a stand mixer, or by hand, add the wet mixture to the dry mixture. Beat until smooth on medium speed. If dough is too wet, add a little more flour to make the dough soft.


On a lightly floured surface (or in the mixer bowl with bread hook), knead dough until smooth and elastic, about 5-6 minutes. 


Lightly grease a large bowl with a bit of oil and place dough into bowl, turning once to coat. Cover with dish towel and let rise for 45 minutes, or until doubled in size. 
Line a baking sheet with parchment paper and set oven to 400 degrees.
Punch down dough and, on a lightly floured surface, divide into 8 balls. Shape each ball into a long oval, roughly the size of the hoagie roll you wish to make. Arrange long ovals on parchment paper about 2 inches apart. Slice a 1/4-inch deep slit across the top of each piece. Cover again and let rise an additional 25 minutes.

Bake for 10-15 minutes, or until golden brown. Remove from oven and let cool on wire rack.


Until tomorrow...Peace.
Pin It Now!

Friday, March 23, 2012

Two out of three ain't bad...

I have always appreciated a satisfying Caesar salad, but as I am sure many of you know there are good and bad one's. It is truly disappointing to receive a "bad" one. The salad's creation is generally attributed to restaurateur Caesar Cardini, an Italian immigrant who operated restaurants in Mexico and the United States. Cardini was living in San Diego but also working in Tijuana where he avoided the restrictions of Prohibition. His daughter Rosa (1928–2003) recounted that her father invented the dish when a Fourth of July 1924 rush depleted the kitchen's supplies. Cardini made do with what he had, adding the dramatic flair of the table-side tossing "by the chef."  There are also multiple different styles of Caesar dressing, some are creamy, some oil based, some have raw egg and some do not. I believe part of the attraction in this salad is the salt factor. I crave salty flavors, and this certainly delivers. The anchovies, Worcestershire, and Parmesan all pack the salt into this flavorful salad. The Caesar dressing that I prepare is oil based (it still produces a creamy effect), and does not contain a raw egg. I find that a tablespoon of mayonnaise suffices nicely in place of the egg. This also creates a slightly longer shelf life. You will never desire bottled Caesar after tasting this recipe. Another element of my salad is grilling the romaine lettuce. Simply take a heart of romaine, slice it down the center, drizzle it with olive oil and cracked pepper then grill it for roughly one minute cut side down. This wilts the lettuce ever so slightly, and supplies it a smokey charred taste that compliments the dressing. I chose to top this delicious salad with grilled flank steak that I marinated in a vinaigrette overnight.


Grilled Romaine Hearts with Caesar Dressing

1 T mayonnaise
1 t Dijon mustard
1 t freshly ground pepper
1 t dry mustard
1 t Worcestershire
juice of 1 lemon
5 anchovy fillets
4 cloves garlic
2 T white vinegar
1 C olive oil

2 hearts of romaine, halved
fresh pepper
olive oil
grated Parmesan cheese
croutons

Put all ingredients except vinegar and oil in a food processor and process until blended. Slowly mix in the oil, then mix in the vinegar. If too thick, add a little water.

Brush the cut side of the romaine hearts with olive oil. Season with cracked pepper. Grill, cut side down for 1-2 min. Roughly chop lettuce, drizzle with dressing, sprinkle cheese and croutons.

If you would like to serve it as I did with flank steak, simply marinate the meat overnight in your favorite Italian vinaigrette and grill until medium.

Until tomorrow...Peace.


Pin It Now!

Thursday, March 22, 2012

I'm lost, but I'm hopeful...


I present you with yet another tart. It is a personal mission to increase the love and appreciation for tarts, the best way to attempt this is by supplying you with multiple recipe choices. I have concluded (at least for the time being) this is my favorite tart, due in part towards my love of almonds. The base is a pate brisee disk, the same as all my previous tarts. Following is a layer of frangipane, simply almond cream. Atop the cream rest pears, glazed with a thin coat of apricot jam. I used canned pears in this recipe, but you may certainly use fresh if they appear particularly appealing. In this case they would require poaching first, as the tart itself does not take long enough to thoroughly bake the fruit. This is a welcomed change from traditional pastry cream, as it is not as sweet. The frangipane is divine with a pot of hot tea.


Pear Almond Tart
1 disk Pate Brisee**
2 T flour, more for work area
1 C blanched almonds
3/4 C confectioner's sugar
1 stick unsalted butter, cubed cold
1 egg
1 teaspoon salt
1/2 t almond extract
1/2 C apricot jam
1 large can pear slices, patted dry

Preheat oven to 375 degrees. Roll dough to fit the size of the tart pan you are using. Fit dough into a tart pan with a removable bottom. Refrigerate while you prepare the almond cream.
In a food processor, pulse almonds and sugar until finely ground. Add butter, egg, flour, salt and almond extract and process until well combined.
Spread almond filling in chilled tart shell. Arrange pear slices on top, fanning them if desired. Place on a rimmed baking sheet. Bake 40-45 minutes or until crust is golden brown and almond cream is puffed and set. Transfer to a wire rack and cool in the pan. Remove from pan. Melt jam and brush over tart. Cool before serving.
The tart may be served with whipping cream and almond slices.

**Recipe for pate brisee on post titled...You may ask yourself how did I get here 2.21.12.

Until tomorrow... Peace.

Pin It Now!

Wednesday, March 21, 2012

Instant karma's gonna get you...

Today Nowruz (Persian New Year), very simply "new day", is being celebrated in many parts of the world. Nowruz marks the first day of spring and the beginning of the year in Iranian calendar. It is celebrated on the day of the astronomical vernal equinox, which usually occurs on March 21 or the previous/following day depending on where it is observed. As well as being a Zoroastrian holiday and having significance amongst the Zoroastrian ancestors of modern Iranians, the same time is celebrated in parts of the South Asian sub-continent as the new year. The moment the Sun crosses the celestial equator and equalizes night and day is calculated exactly every year and Iranian families gather together to observe the rituals. Originally being a Zoroastrian festival and the holiest of them all, Nowruz is believed to have been invented by Zoroaster himself, although there is no clear date of origin. Since the Achaemenid era the official year has begun with the New Day when the Sun leaves the zodiac of Pisces and enters the zodiacal sign of Aries, signifying the Spring Equinox.

Today my post is a contemporary bread recipe for those of you that have joined me in my homemade bread challenge ( I realize this has nothing to do with Nowruz, but this would be a perfect time if you have not already done so to join my bread challenge). If you enjoy everything bagels you will fancy this bread. It toasts beautifully, and is ideal for sandwiches (think large BLT's with avocado). The recipe only makes one loaf, but may effortlessly be doubled. I have concluded if I am going through the motions of making homemade bread I prefer to bake two loaves at once, and then freeze one.


Everything Bread


3 3/4 cups (18 3/4 oz) all-purpose flour
2 tsp kosher salt
1 cup cold buttermilk
1/3 cup boiling water
2 Tbs unsalted butter, melted
3 Tbs honey
1 envelope (about 2 1/4 tsp) instant yeast
2 tsp poppy seeds
2 tsp sesame seeds
2 tsp dried minced garlic
2 tsp dried minced onion
3/4 tsp kosher salt


Bring the water to a boil in a small saucepan. Remove from heat and add the cold buttermilk and stir to combine.


Mix 3 1/2 cups of the flour and the salt in the bowl of a stand mixer fitted with a dough hook. Add the buttermilk/water mixture, butter, honey, and yeast to a liquid measuring cup. Turn the mixer on low, and add the liquid in a slow stream, increasing the speed of the mixer as you go to medium. Continue mixing until the dough is smooth and satiny, stopping to scrape the dough from the hook as needed. Sprinkle in 1 tablespoon of the everything spice mix. Knead about 10 minutes, adding flour 1 Tablespoon at a time, as necessary to keep the dough from sticking to the sides of the bowl.


Turn the dough out onto a lightly floured surface and knead to form a smooth ball, about 15 seconds.


Place the dough in a lightly oiled bowl, rubbing the dough around the bowl to coat with the oil. Cover tightly with plastic wrap and place the bowl in a warm place until the dough doubles in size, 50-60 minutes.

Turn out onto the floured surface and gently press the dough into a rectangle that is 1 inch thick and 9 inches long. With the long side facing you, roll the dough firmly into a cylinder, pressing with your fingers as you roll to make sure the dough sticks to itself. Turn the dough seam-side up and pinch it closed.

Place the dough seam-side down in a greased 9x5 inch loaf pan, and press it gently to make sure it touches all four sides of the pan. Sprinkle with the everything spice mix (you don't have to use all of it - I think I used a few more teaspoons of it), lightly pressing with your hands to adhere the spices to the dough. Cover with a clean kitchen towel and allow to rise in a warm spot until the dough almost doubles in size, 20-30 minutes.

Preheat the oven to 350 degrees. Place an empty baking pan on the lowest rack of the oven. Bring 2 cups of water to a boil and pour into the empty pan. Set the loaf onto the middle rack, and bake until an instant-read thermometer inserted into the center of the loaf reads 195 degrees, about 40-50 minutes.

Remove the bread from the pan and cool to room temperature on a wire rack. Slice and serve.


Until tomorrow...Peace.
Pin It Now!

Tuesday, March 20, 2012

It's a beautiful day in the neighborhood...

Today is Mr. Rogers birth date. This fact is totally irrelevant to my post, but I was a loyal fan of his for many years. I threw caution to the wind and did some deep frying today, I must admit the result was fantastic. I decided that homemade chile rellenos were in order. Chile rellenos literally "stuffed chiles" originated in Puebla, Mexico. They consist of roasted fresh poblano peppers (a mild chile pepper named after the city of Puebla) that are stuffed with cheese. I selected to add homemade refried beans to my stuffing in order to supply them with additional substance. I used egg whites as the batter for the chiles, and this formed a light airy coating. An elementary sauce serves as a base for these fried delights. This is an excellent vegetarian option.


Chile Rellenos

Sauce:

5 red plum tomatoes
2 garlic cloves
1 medium onion, halved
1 jalapeno
1 tablespoon olive oil
Salt and freshly ground black pepper

Filling:
1 1/2 cups Monterrey Jack cheese
1 tablespoon dried oregano
1 medium onion diced
1/2 can green chiles
1 cup refried beans (recipe below)
6 poblano chiles, charred, seeded, and deveined *
3 egg whites, at room temperature
1 egg yolk, at room temperature
All-purpose flour, for dredging
Vegetable oil, for frying

Sauce: Put the tomatoes, onion, jalapeno and garlic on a baking sheet. Drizzle with olive oil, and season with salt and pepper. Roast at 350 degrees until tender. Place roasted veggies in the food processor until smooth. Heat in a saucepan.

Chile rellenos: Saute onions and green chiles over medium heat until soft. Mix the cheese and oregano in a small bowl, add sauteed veggies and beans. Cut a slit through 1 side of the charred chiles and fill each chile with 1/4 cup of the cheese mixture. Close with toothpicks to hold the filling in place. Place the stuffed chiles on a tray and put in the freezer (this makes the frying process easier), until firm.

 In a medium bowl, using an electric hand mixer, beat the egg whites on high speed until soft peaks form. Add the egg yolk and continue to beat for about 1 minute. In a large heavy-bottomed saucepan, pour in enough oil to fill the pan about a third of the way. Heat over medium heat until a deep-frying thermometer inserted in the oil reaches 375 degrees. Dredge the filled chiles in flour until fully covered. Shake off any excess flour, then dip the chiles into the egg mixture, until well coated. Fry until golden brown and drain on paper towels.

Arrange the chiles on a serving platter, spoon the sauce on top and serve.

*To char the chiles (or any fresh chile): Put the chiles over a gas flame or underneath the broiler and cook until they are blackened on all sides. Enclose them in a plastic bag and let stand for 10 minutes to steam, which will make them easy to peel.

For the refried beans. Dice one onion and 3 cloves of garlic. Saute in a saucepan with 2 T olive oil. Once the onions are soft add one can of pinto beans, 1 bay leaf, 2 T tomato paste, 3/4 C chicken stock, 1 t cumin and 1 t chili powder. Salt and pepper to taste. Simmer on medium low until soft, about an hour (remove bay leaf) then gently mash.

Until tomorrow...Peace.
Pin It Now!

Monday, March 19, 2012

Take a walk on the wild side...

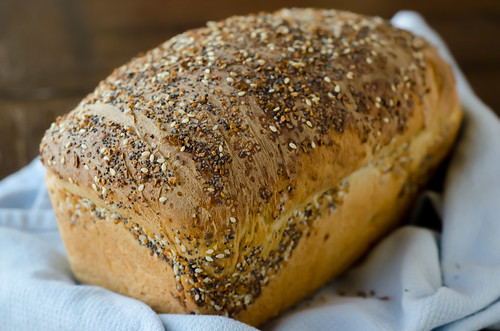
Today I am providing you with an early idea for summer (or anytime) grilling. It is a spin on the traditional ground beef patty. I chose a Mediterranean twist, and positioned the meat on a skewer (you could also form it into a patty). This is similar to street food that you run across in many European countries. Fresh mint, cilantro, garlic, onions, peppers and a hint of cinnamon were components of the patties. To moisten them I stirred in one egg and Greek yogurt. These are delectable rolled in a flatbread, or savored along side a cold salad. I prepared a simple mango chutney that was a distinctive sweet yet sour addition to the meat. The chutney is highly versatile, and I am sure once you taste it you will definitely be keeping a jar in the fridge. This creates a lovely gift, as it is a unique relish. I have included multiple recipes for sauces, so that you may have a variety of ideas for serving. Kick off spring with a new twist on burger night.


Grilled Ground Beef Kabobs

2 pounds ground beef
1/2 cup plain Greek yogurt, plus more for serving
1/4 cup fresh cilantro leaves, finely chopped
1/4 cup fresh mint leaves, finely chopped
1/4 teaspoon ground cinnamon
2 to 3 cloves garlic, finely chopped
1 egg, lightly beaten
1 lemon
1 Hungarian wax chile pepper, seeded and finely chopped
1 small onion, minced
Kosher salt and freshly ground pepper
Vegetable oil, for brushing
Cooking spray
Chutney, for serving (recipe for mango chutney below)
Flatbreads, for serving (recipe on post titled: Sing for the laughter 2.20.12)
lettuce and tomato, for serving

Combine the ground beef, yogurt, herbs, cinnamon, garlic, egg, the finely grated zest of the lemon, chile pepper, onion, some salt and lots of pepper in a large bowl. Form one-sixth of the meat mixture around each of 6 metal skewers (if you don't have skewers, you can form it into patties). Brush with vegetable oil.

Heat a grill pan or griddle over medium-high heat until very hot, then spray with cooking spray. Add the kabobs and cook, gently turning occasionally, until cooked through, 10 to 12 minutes.

Cut the lemon into wedges. Serve the kabobs with the flatbread, lemon wedges, chutney and yogurt.


Mango Chutney

1 ripe but firm mango
1 sticks cinnamon
2 whole cloves
1 tsp cumin seeds
1 tsp coriander seeds
2 cardamom pods, cracked (ground may be used)
1 tsp ginger, grated
2-3 whole dry red chilies
1 clove garlic, crushed
3/4 cup demerara sugar
1/2 cup vinegar
3/4 cup water
1 tsp salt


Cut the mango into 1 inch cubes and for chunky chutney, keep some pieces about 2 inch. If you are looking for smooth, cut them all in same size.

Using a piece of thin cheese cloth, tie up the spices into a bundle. Cook the mango, spices (in the muslin cloth), water, ginger and garlic until the mango is tender. Some pieces will disintegrate into the water. Takes about 10 minutes.

Add the vinegar, sugar, salt and dry chilies. I like to break 1 red chilly into flakes and keep 1 whole. If you want and are feeling adventurous you can go up on the chilies. The sugar requirement may also vary depending on the sweetness of your mango and personal preference. Feel free to reduce or add as per your liking.

Cook for about 30 -35 minutes until the chutney is thickened. Squeeze every bit you can from the cloth and discard it. Transfer to a jar while still hot. Don’t put the lid, until the chutney cools. It keeps well for 4 weeks in the refrigerator.

**The other garnishes in the photo are hummus, tzaziki, and gardiniera.
    ~hummus recipe on post titled: I don't need a thrill ride I'm already thrilled enough 2.17.12
    ~tzaziki recipe on post titled: Get in line here comes the truck 2.6.12
    ~gardiniera recipe on post titled: I won't worry my life away 3.1.12


Lentil and Potato Salad

1 cup lentils
1 large fresh bay leaf
1 large russet potato, peeled and cut into 1/2-inch dice
Kosher salt
3 tablespoons vegetable oil
1 small red onion, finely chopped
2 cloves garlic, finely chopped
One 1-inch piece ginger, peeled and grated
1 green chile pepper, finely chopped
1 T ground turmeric
1 1/2 t ground cumin
1 1/2 t ground coriander
1 t powdered mustard
1/8 t cinnamon
Handful fresh cilantro leaves, finely chopped
2 cups baby spinach, chopped (optional)***
Juice of 1 lime

Bring the lentils and bay leaf to a boil in 3 cups water, then reduce the heat and simmer until the water cooks away, 15 to 18 minutes. Skim any by-product away as the lentils cook.

Meanwhile, cover the potatoes with water in a small pot and bring to boil. Salt the water and boil for 5 minutes. Drain the potatoes and run under cold water to cool. Drain well and transfer to a large bowl.

Drain the lentils and run under cold water to cool. Drain well and add to the potatoes.

Meanwhile, heat the vegetable oil in a skillet and saute the onions, garlic, ginger and chile pepper until softened. Stir in the spices to toast them, then remove from the heat.

Add the spice mixture to the lentils and potatoes. Gently stir in the cilantro, spinach and lime juice. If the salad seems dry, add a little more oil. Serve.

*** This salad may be served at room temperature with or without the spinach. You may also add another vegetable in if you prefer. If you chose not to use the spinach it goes nicely on a bed of lettuce or atop flatbread.
Until tomorrow...Peace.

Pin It Now!